Tuesday, May 17, 2011

Title goes here.

Story:

There isn't a whole lot more to update folks on right now. Due to my new job, I only have two days a week to work on the tiny house, so updates may become even more sparse than they have been. In order to stay updated but not have to check in and be disappointed a whole bunch with no new content, I suggest subscribing to the blog :D

Two things happened of import in the past week; One tiny house related and one not so much. The not so much part is that I finally received my diploma from Evergreen. Hooray! I guess! It's certainly the most expensive piece of paper I've ever held. With my receipt finally in hand, I am officially finished with college.

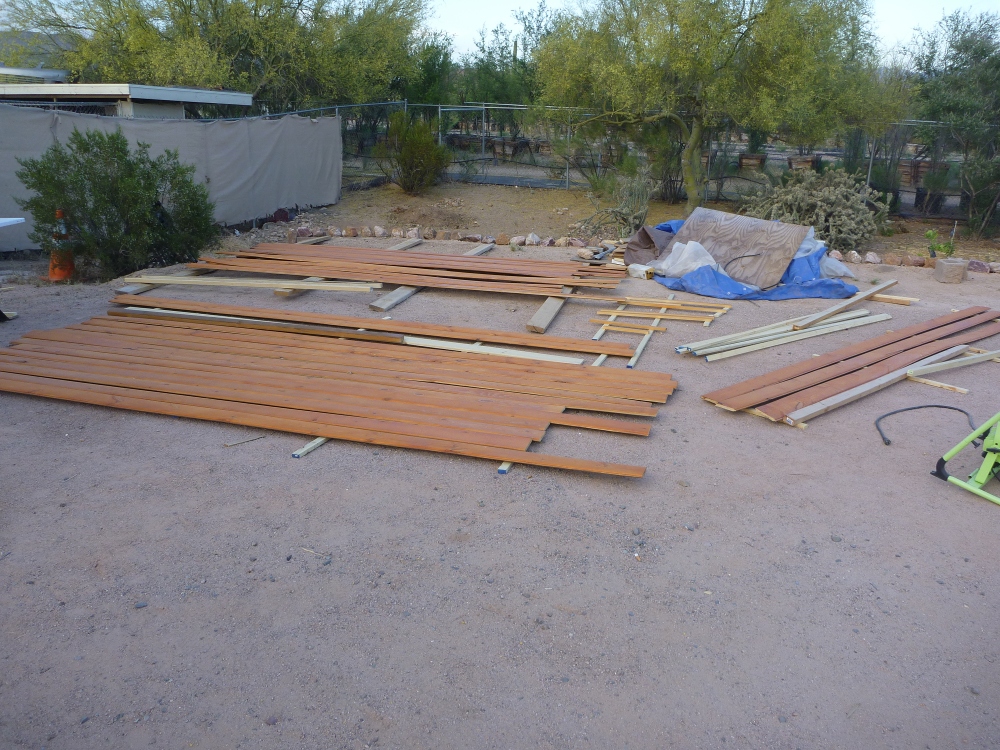
Second, I've gotten the new rough sawn pine for the exterior siding and have been working on getting that ready to go. They were really dirty, so I had to powerwash them all down. They all cleaned up beautifully and are now looking really nice. As an added bonus, because they were sitting outside in Arizona for 2+ years, they had already acclimated to the hellish heat out here and, after a good wash, returned right back to being straight as an arrow.


After that, they'll require sanding, notching (which means using a table saw (which I need to acquire) equipped with a dado blade with a 3/8" kerf to cut out the notches to turn the boards from this into something like this.

Schematics:

I'd like to point out here that Tumbleweed Tiny House Co. founder Jay Schafer claims that he has built a dozen small houses using only 14 tools. They are: Skill saw, jig saw, pliers, files, miter saw, hammer, wrench, goggles, tape measure, drill and drill bits, pencil, box cutter, level, chisel. He adds a caveat about how people call him "a fool for not using a table saw". I agree. Here is a list of other tools I have needed/been greatly aided by in my construction up until this point (which involves almost nothing in the overall picture of building a tiny house):
 
1. Brushes - He lists "pencil", but not brushes? Am I to believe that he used no stain on any of the exterior boards of his house? Or, since it's obvious that he has used stain, that he took a big swig of Olympic Semi-Transparent and spat it all over the boards until achieving a nice, even finish? I find this prospect unlikely.

2. Nail punch - I realize that he mostly uses screws for outside construction, but he does mention nails for finishing work. And, unless you want to have nails sticking out all over the place or have a bunch of hammer dents in your finishing material, you damn well need a nail punch. Or perhaps he just got a really really hard pencil and used that. 

3 & 4. Painter's mask or bandanna and gloves - Eye safety, but nothing to stop yourself from inhaling particulate matter or your hands from getting torn up?

5. Sandpaper - Come on. Everything you bought could make a baby's butt look like crocodile skin?

6. Orbital sander - I'm not sanding 1200 lineal feet by hand.

7. Caulking gun - If you refer to the "screw and glue" method, I hope you're not referring to Elmer's glue. Liquid Nails, the only stuff even worth using for structural applications, will only come out of a caulking gun. I'm assuming I'll need that again when I work on the bathroom and the sink).

8 & 9. Car jacks and jack stands - Pretty important, especially if you can't complete the house in a month and it needs to sit out for a long time (and flatten the tires so you have problems on a long trip, something which I have absolutely no experience with whatsoever :| )

10. Corded drill with high speed steel drill bit - This is the only way that I know of to get through the angle iron of the trailer to bolt the house down.

11. Razor scraper - A very easy way to undo a bit of overzealous caulking.

12 & 13. Power washer and spray gun for stain/paint - Admittedly a luxury item, it can make life very easy. However, when using a spray gun, use only oil based stains. Water-based paint or stains screw up the gun and leave a bunch of spotty water marks on your boards.

I've almost doubled the list right there and my house is barely more than a wood box right now.

Sunday, May 8, 2011

Wood, Poop Stain, Fire, and a Cowboy

I've decided to split the tiny house portion of this blog into two parts. One, more interesting to my friends, will be the story. The second, more interesting to those with the crazy notion of building a tiny house themselves, will be dedicated to schematics. Aaaaaaaaannnnnnd go:

Story:

I've spent the past week preparing to put up the siding. Since I can't very well operate miter saws and sanders at 5 am, today's bounty of work begins with a nice, relaxing cup of coffee.

picturesque

The siding we got, after much hunting and searching, was 1x6 tongue and groove ponderosa pine. It cost between 60 and 75 cents per lineal foot. I really wanted a lap siding, particularly cedar, but that cost about $1.50 a lineal foot, so it was kind of out of the price range. Anyway, we trucked it home from west Phoenix (an hour each way) and commenced with sanding and staining and sanding and staining and sanding and staining.

lots of this type of action went down

First we got a "Semi-Transparent" stain called "Light Mocha". That went over about as well as the Hindenburg.

ew.

By "Semi-Transparent", it appears the manufacturer meant "Mostly-Opaque". Also, by "Light Mocha", they must have meant "Poop Stain". These are easy mistakes to make as I'm sure the factory is a busy and hectic place. I do not blame them. Reality is subjective anyway.

To remedy this eyesore, we ended up using the garbage stain to seal the back of the boards, grabbing some "Toner," and trying that for the front of the boards. Result:

urge to kill... falling... falling... gone.

Pretty boards! I am happy. We finish every last one and are ready to go. Then, this morning at about 1 am, I found this Craigslist posting:

WOOD SIDING - $7

This siding is brand new rough sawn pine. Each board is 13' long
I am selling them for $7.00 each.

image 0
pictured: exactly what I wanted... two weeks ago.

This stuff is beautiful. I stay up all night over it and kick my feet in the dirt a bit before mom suggests I call the guy because I'm going to have to live with whatever I put up and if this stuff is perfect, I'll never like the other siding again. Turns out the posting is from some very cowboy-sounding person named Ken (henceforth referred to as Cowboy Ken). Well, Cowboy Ken actually cut down the trees and milled this lumber himself. Much later on in the day, I went over to look at the samples of the stuff he had (which was in the form of a massive barn that could fit three of the tiny houses in it along with extra room for some horses, a few shotguns, and a mess of spittoons. It's gorgeous. End of the story, we're getting it Thursday and I'll spend all weekend with mom re-milling and staining the new siding. I'm not sure what we're going to do with the pile of newly spurned siding in the yard.

fail. so much fail.

So I focused today on continuing to frame out and fur the house. I have one wall totally completed. I will take a picture and upload that tomorrow.

I made a few mistakes here and there. Okay, quite a few mistakes...

oops.

But, overall, I think I did a pretty good job at this stuff. We'll see how the new siding works out, but not very soon, because tomorrow I start my new job! This way, I can work five days a week to make money so I can spend it on materials to use in the other work I do the remaining two days of the week.

WHEEEEEE!

Finally, one really cool thing I did was download Google Sketch Up so I can make a 3D model of my house and try out ideas before I commit to them. Also, having a set of visual plans reaaaaally helps in this process (By helps, I mean is absolutely 100% indispensable). Here are a few screen captures from what I've been able to put together so far:


the program comes with a free flatlander!

Anyway, I think that's it for right now. I'll fill you all in when I get the new siding this upcoming week. SPOILER ALERT: More staining. Right now, I'm going to go sit by a fire and summon flame dragons to destroy my enemies.

welcome back, my sweet. there is work to be done.

Schematics:

(Work in progress. Will finish tomorrow when I have more pictures.)

To help other folks get an idea of what I've done and if any other tiny home builders stumble across this blog looking desperately for help (there's not a large amount of nuts and bolts info out there, certainly not for free), here is what's going on in this picture:

1. DuPont Tyvek HouseWrap: This provides a vapor barrier so that moisture outside can't get inside, but moisture inside the walls can get outside of them. This helps reduce condensation in the finished house. That's important because, in a tiny space, condensation happens very, very fast (Think sexy time in a car. Windows fog up immediately. If you're doing it right :P). There are free instructions online here about how to properly put up Tyvek HouseWrap. I didn't put it up myself, so I don't know how well they were followed initially, but I know I've definately gone over the 90 days they suggest as a maximum to leave the Tyvek wrap exposed. It'll be covered up soon enough.

2. Furring: These are designed to place air between the siding and the housewrap. This provides better insulation as well as helps the house "breathe." I used 1"x2" furring strips available at Home Depot or Lowes. It is a consistant battle to find any decent stick of wood in Arizona because the dry heat and the sun sucks all the moisture out of the wood and warps it instantly. For example:

top: hockey stick       bottom: lock pick rake

So make sure you check every board you get. This goes double for siding and long finishing boards. A warped board sucks to work with. And if you live in a hot, arid climate, stain the boards IMMEDIATELY to make sure they don't warp on you. I mean it. 5 days in the sun is TOO MUCH.

Tuesday, May 3, 2011

Hi there folk(s) (I'm not sure how many people read this blog at this point),

It's been a little while since I've updated, but I haven't been sitting idle (too much). I've ordered, received, and started working my ass off on putting up the siding. I'll have pictures and info on how we're overcoming little problems at every turn after it looks a bit more impressive. Right now, I'd like to put up the first of a two part story I promised on how exactly I got down here. With no further ado, part one:

*-*-*-*


Too excited to sleep, I leapt from bed (well, groaned as I rolled out of bed) at 4 in the morning. I busy myself by burning CDs for the trip. At 6:00am, I'm at the house preparing for the journey.

The first thing we have to do before even thinking about hitting the road is secure the house to the trailer. I haven't the faintest idea why this was not done when the floors and walls were being built, as the house was towed to my yard attached to the trailer by four wood screws, but after working on this a bit, I am seeing how easy it is to miss a crucial step.

Anyway, we have the power drill, the huge bit to plow through all the wood and angle iron, the long ass bolts, and the washers and nuts. We're ready to go. It's raining, it's cold, it's 7:00am. All nine go in with what seems to be little effort. Though, I wasn't the one doing the drilling, so my evaluation of the effort required may be skewed. What I'm saying is, when I tried, I failed miserably; when Andy put the drill through, it went like butter. There was one point when I had to tighten one awkwardly situated nut and made sandwich meat out of my finger with the bolt and the angle iron as the bread. The rain caused my hand to quickly become rather covered in blood and I enjoyed my new status as a psuedo-action-hero-looking individual.

On the last hole we have to drill, right after it punched through the trailer, the drill broke. The good news was we didn't need to drill any more holes in the trailer. The bad news was, we still had more holes to drill in the house. My friend Alex comes over with my old drill. We put a plywood board over the windows so they didn't get broken by rocks on the highway. With everything in place and bolted down, we hitch the house up to the monster truck that Andy is driving. The house tilts farther and farther back to reach up to the hitch until resting at an angle that makes it appear as if I've decided to launch the house into space rather than tow it. 


T-minus one brake light.

We begin our journey by testing the clearance above and below. We get a total of 10 feet (yes, that's feet) before the trailer bottoms out and smashes off the left brake light. This will be a recurring theme. By the time Andy brings the truck around front to investigate, the wires in the broken light touch causing a short circuit and blowing a fuse in his truck, shutting off ALL the brake lights. Cue the first of multiple trips to Wal-Mart.

***A disclaimer before I continue. I am an avidly anti-walmart individual. Anyone reading this should know as such. However, we were traveling on a Sunday, at all hours, in unfamiliar places and needed a store which was open 24-hours, guaranteed to have the part, and had a large parking lot capable of easily setting up a temporary workshop to quickly do repairs. I begrudgingly agreed that Wal-Mart would be our best option. On with the show.***

We get to Wal-Mart and fix the brake light and blown fuse. After a brief stop home to collect a few last things and to say a some depressing “So-long-for-nows”, I gathered up my nerve and we headed onto the I-5.

We had gone almost 20 miles before problems arose.

The tire on the right side of the trailer appeared to be in serious jeopardy. We pulled into a truck stop off of exit 88 and jacked up the house for the first of about six or seven times. The wheel is warped from not being moved around for many months. So we made it twenty miles before needing to use our one and only spare tire. As we're changing the tire, I see some state troopers slow-roll by us from the gas station. The passenger cop points at the house and looks at his partner. His partner shrugs and they speed away. I am relieved.

After pulling into another gas station across the road, we discover that the other tire we didn't change is about 20psi too low (read: what we just did was tremendously dangerous). We inflate it back to regulation and get back on the road.

We make it another 60 miles before the other wheel starts to go.

I call up Andy and we decide to make it to Portland because that's where our best chances are of finding an open tire shop. In Portland, we begin to pull into Wal-Mart #2... and crack off tail light #2. 

  
We don't need no stinkin' tail lights... oh... we do? Okay, let's get a tail light...

Fortunately, we're at Wal-Mart, so we don't have to drive on one light. Andy goes inside and discovers that there is a 3 hour wait to install the new tires. I stay outside and discover that my car won't start. I decide we'll deal with that later. We pick up two new brake lights (one for a spare) and a new hitch that has a 5-3/4” drop. This levels the house out a bit. I call around to tire places and find a Sears Auto open about three miles down the road. Checking my car, I remember that Alex miraculously fixed my car a few days previously by slamming the hood. So, like a jukebox or an old TV, I wonder if my car only requires a good, swift, Fonzie-esque kick to get it going. Sure enough, slamming the hood works. Andy installs the new taillight and I buy a lower drop hitch to help us clear the ground easier because I really don't feel like buying 15 replacement taillights that last only until we need gas again (which is about every 100 miles). We drive out to Sears Auto and they do not have the proper tires. Realizing I should have asked about the particular tires on the phone, I begin searching for a new auto shop. About this time, someone comes sauntering up and asks if he can look around at the house. I was expecting, even looking forward to this kind of thing, but now was not the time. I say sure, but am very short regarding his questions, promptly telling him it's on dead tires and I need a tire store that is open at 4pm on a Sunday. I happen upon a local tire shop that has the right tires for $87 each installed right away. We get over there and everything goes beautifully (except that about $200 evaporates from my pocket). We hit the road again.

There are no problems for a while now except that we discover exactly how many miles per gallon the truck is going to get hauling a house.

The answer is 3.

3 mpg. Highway. The truck needs to fill up it's two tanks, 17 and 19 gallons respectively, about four times for every time I have to fill up my 12 gallon tank. I leave behind a bit of my misty-eyed infatuation with this project at every gas station, along with a proportionately-sized wad of currency.

Near Eugene, we pull into a gas station which has an S-mart. I had no idea that S-mart was a place that existed in the real world. Thinking it was only relegated to the “Evil Dead” world, I was delighted to take a picture of the sign. 

I swear to imaginary god, that crummy picture is of an S-mart sign.

While I was doing so, Andy's truck overheated and threw up anti-freeze all over the ground. He proceeded to remedy that situation and we were off again.

Later on down the line, Andy pulls over to sleep. By this point, I have had a total of 1 hour of sleep for nearly 18 hours of driving, but I've also consumed 14 shots of espresso. I am obligated to keep my focus unbroken or suffer the after-effects of so much caffeine. Like an engine, I know I require much more force to overcome inertia than to just keep going. I play guitar and read.

Back on the road, we make it to California. Of course, the obligatory fruit-and-vegetable shakedown occurs at the border:

“Are you transporting and fresh produce?”
“Nope!”
“Have a nice day.”

I have never understood this.

*-*-*-*

Part Two is forthcoming.